C64 dev using VSCode (Linux)
How I setup my C64 development environment using VSCode, VS64 extension, ACME and CSS compiler.
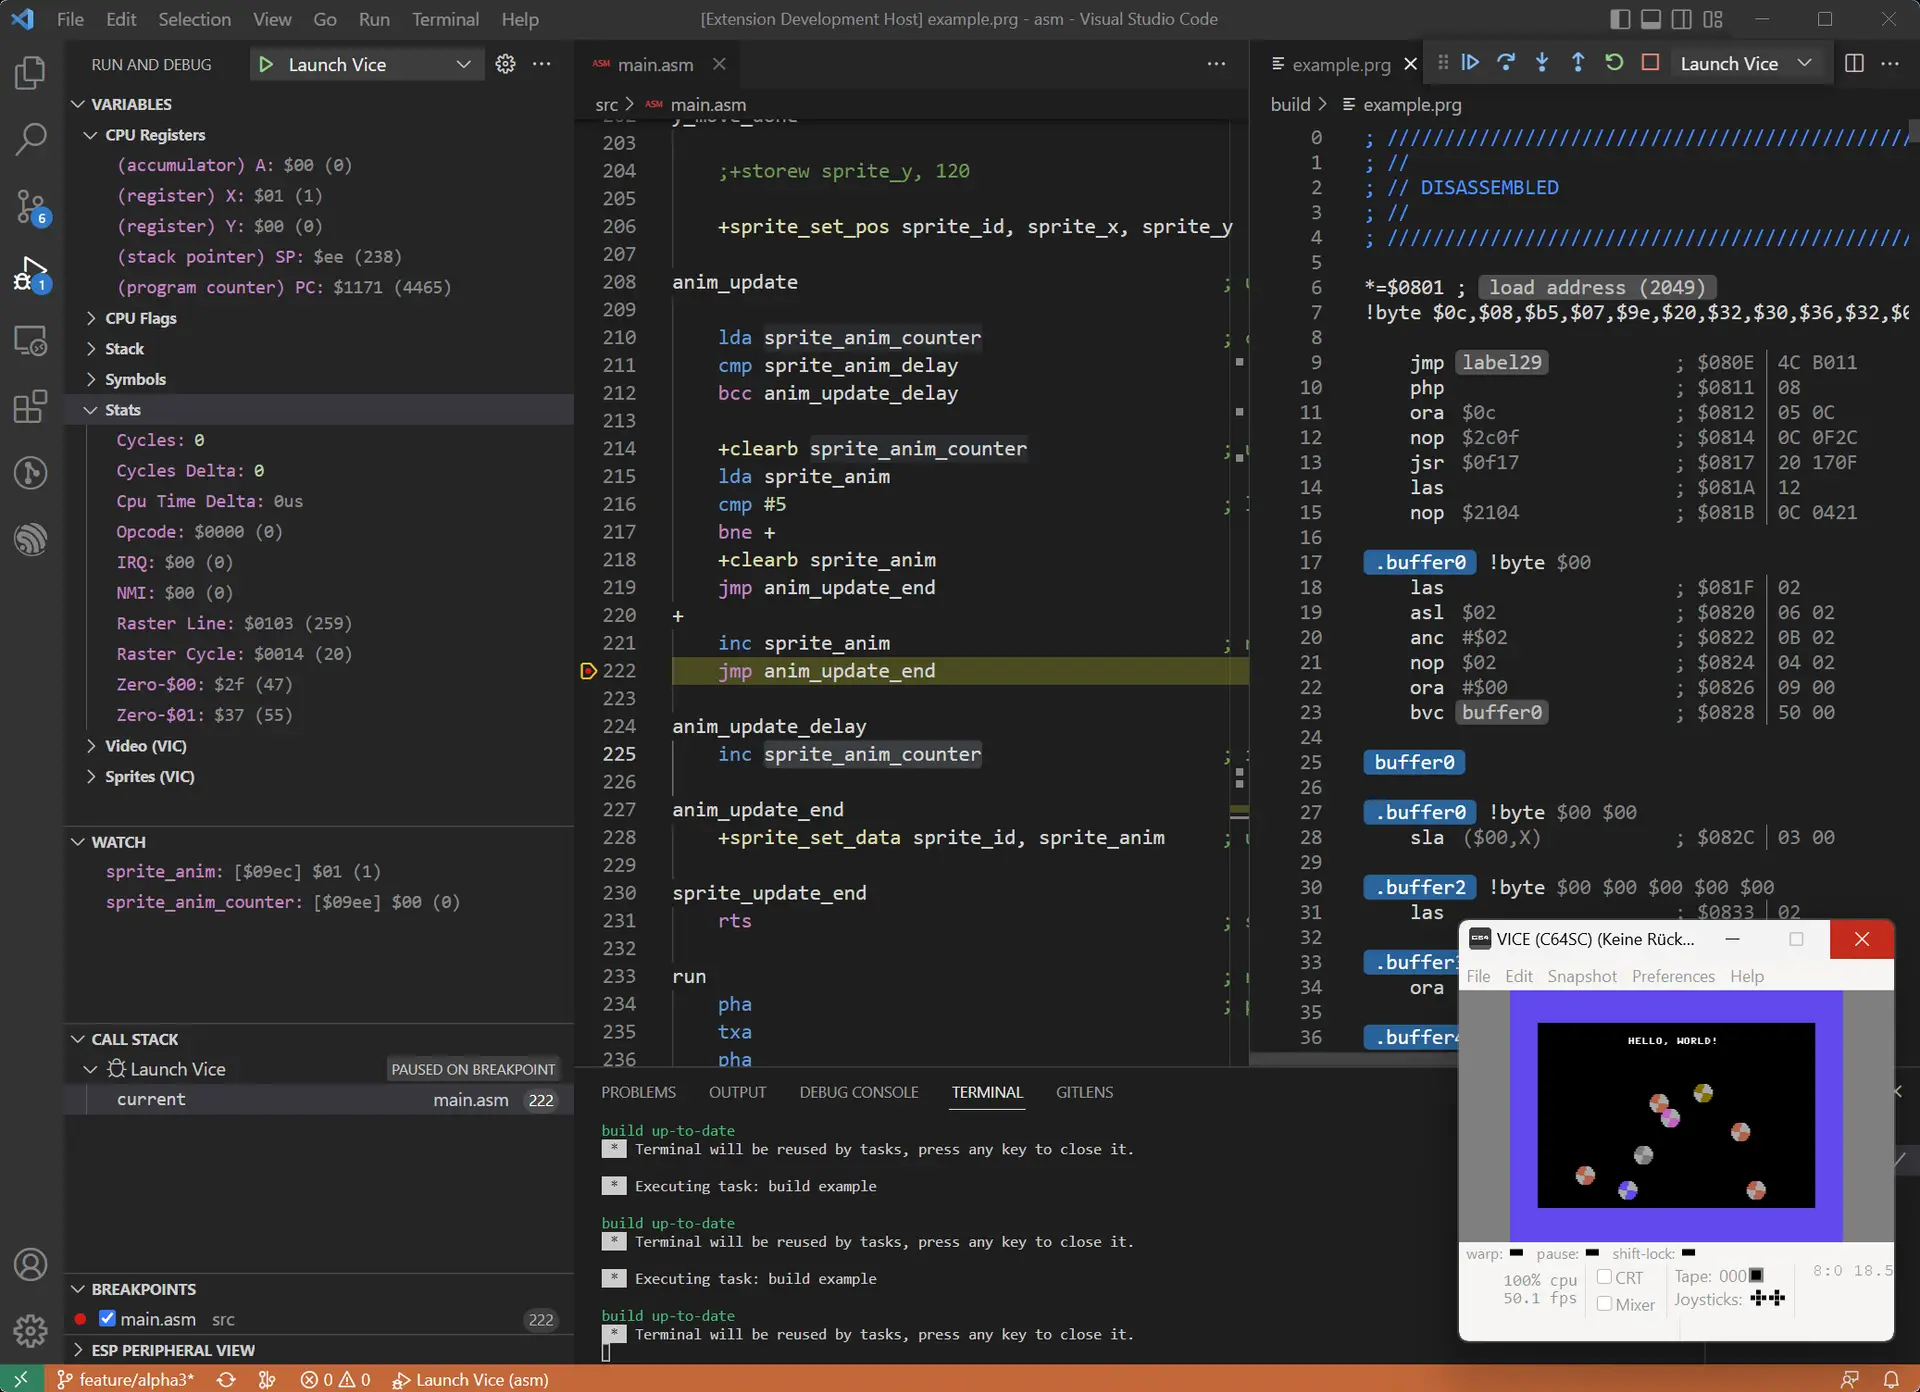
Using VS64 with ACME (6502 Assembler and BASIC) and CCS compilers (C code)
After a few trial and errors with using native programming tools on physical hardware. modern emulation hardware and software I settled on used VS code in conjunction with the VS64 extension available in the marketplace, that enables a great modern experience over the top of programming for the Commodore machines like the C64 and C128 using a number of available tools for the cross-compiling into native prg files to execute using the Vice emulation software.
This is based on my initial config and setup and may change over time and if I do I plan to come back and update this with any other snippits of information that I hope other people may find useful in turn if they are looking to set something similar up for themseleves.
The key eyed amongst you will not that the below is based on a setup on a Linux platform (actually Ubuntu).
In order the steps I went through on a fairly clean install of a Ubuntu operating system were:
- Install Vice
- This actually became the point that I learnt for the first time that the VICE project team “… are no more providing binaries for Unix”. This came as a bit of a shock but you can still find ways of installing a version with an internet search, or even if you are feeling adventurous compiling it yourself from source. I’ve never taken to the SNAP package management on Linux, don’t know why I jut find it frustrating in terms of quality someimes.
- Install VS CODE – https://code.visualstudio.com/docs/setup/linux
- Install ACME, I am using ACME rather than Kick just as it removes a dependency on installing Java as well, nothing to do with Wily.E. Coyote. The instructions for where to obtain and install these packages are well documented on the authors’ marketplace page, so I wont repeat them here, following the link to this lower down in this post and you can grab these for yourself.
- Install CCS
- Install VS64
- https://marketplace.visualstudio.com/items?itemName=rosc.vs64
or use the method below, which is the one I ended up using as it worked well
CTRL + P is VS Code and then run the command ext install rosc.vs64
- https://marketplace.visualstudio.com/items?itemName=rosc.vs64
- Now update the VS64 configuration settings to point to the binaries; note these are based on the Ubuntu platform I was using the the install steps above, other Linux versions and methods may change the file paths I needed to use, so check your local install folders.
- Set the path to the ACME binary e.g. /usr/bin/
- Set the path to a VICE C64 binary exe (x64sc) e.g. /usr/local/bin/x64sc (note using another location like /usr/bin/x64sc option did not result in a launch – possibly permissions from the VS Code extension were the cause)

To create an initial working folder for creating a quick C64 assembler test I then did the following:
- Created a new folder / Workspace from VSCode to contain my new test project code and resources
- From the VS Code menu selected View then Command Palette and selected:
- Create Project
- Acme Assembler Project from the available commands to populate the folder with the necessary Ninja build system files and other skeleton configuration files for a new assembler based project, this creates the sub-folders and project-config.json etc files used by the extension.
- Create Project
More details on the setup and build for the extension are very well laid out on the Marketplace page https://marketplace.visualstudio.com/items?itemName=rosc.vs64
Overall I’ve been very impressed when developing using this as I’m familiar with VS Code so I’m very happy working in this IDE for development. Other methods and the exceptional C64Studio is another great way to get up and running for using more modern tools for creating software for these retro machines.