Setup and patching DOS Plus using DOSBOX-X and 86Box
Sean Lewis 17 April 2025Article that goes through the steps I used to be able to create a working IMG hard disk image using DOS Plus v1.2 and MS DOS 3.3.
These steps were created using DOSBOX-X and 86Box,
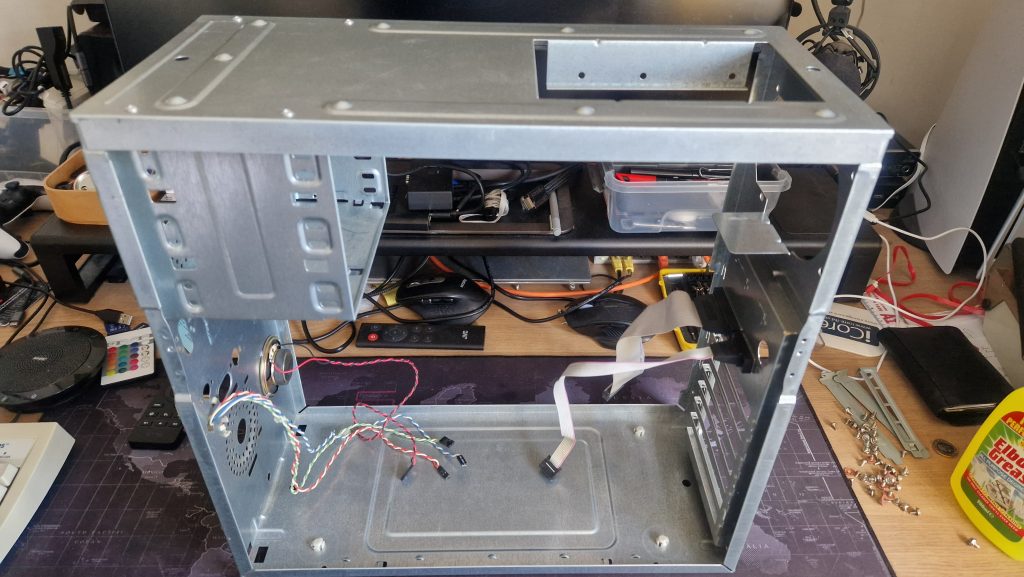
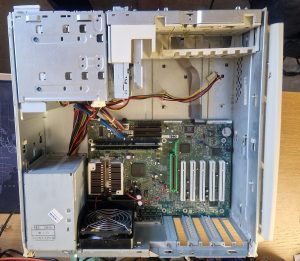
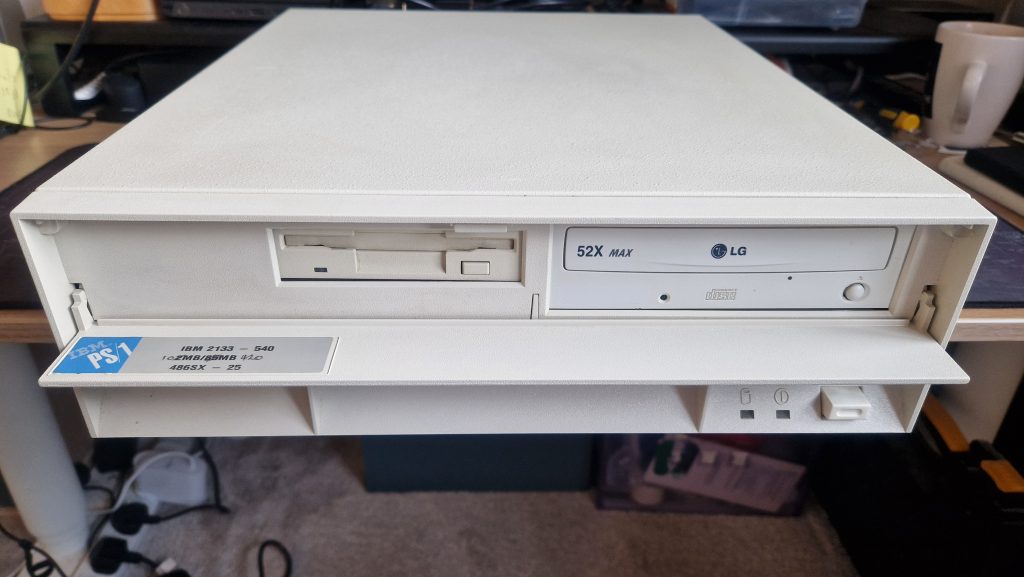
As part of bringing a vintage 8088 clone motherboard back to life, I wanted to be able to run some version of CP/M-86 using this motherboard to re-create a working computer.
Research on the web led me to find that John Elliott made available a method of patching DOS Plus that would support higher-density floppy and larger drive types than the standard DOS Plus would be able to use. This seemed to be a great solution as it would enable the rebuilt computer to be able to boot between DOS Plus to run CP/M-86 software and also MS DOS software at the same time without too much messing around with different partitions or swapping disks, cards in and out to achieve this.
This will mean I can create floppy images in a similar fashion to the 144FEAT2 patch for ‘CP/M-86 For The IBM, Version 1.1’ which enables access to high capacity floppy drives such as 1.44 meg, 1.2 meg, and 720k sizes under that O/S.
So I set about creating an install that would enable me to take advantage of this excellent piece of work by John. The notes below document the method I used to be able to create a working IMG file which can dual-boot using these patches. These are all based on reading around the web and John’s README files with some trials and error leading me to do things slightly differently than John’s information to get the hard disk image to work in the way I wanted.
Hopefully if anyone else has a similar need or desire they will find these notes of use.
I start this DOS Plus install using DOSBOX-X and then move to use 86Box for the final DOSPLUS install as this has been the fastest way for me to be able get to a working image.
The reason for this switch between the two emulators, is to be able to support the boot from the created IMG hard disk image once the DOS Plus loader is installed, as unfortunately DOSBOX-X’s emulation does not support this in the same reliable way a 86Box virtual machine does.
Software BOM (Bill of materials) used for this build:
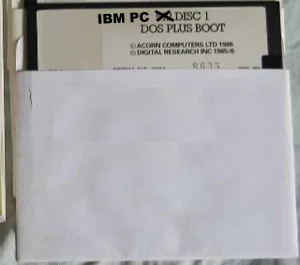
For this build/install I will be using the following Amstrad Disk images, which can be downloaded from this site, which will contain the main DOS Plus v1.2 disks (which are disk 4 and 5)
Amstrad 1512 Disk Images
46001 = Amstrad Disk 1 (MSDOS 3.2)
46002 = Amstrad Disk 2 (GEM)
46003 = Amstrad Disk 3 (GEM DESKTOP and GEM BASIC)
46004 = Amstrad Disk 4 (DOSPLUS Boot Disk & GEM Paint)
46005 = Amstrad Disk 5 (Fixed Disk installation and service disk)
Link: DOS Days – Amstrad PC1512/1640 Downloads
MS DOS v3.3 Install Disks
Link : winworldpc.com – Microsoft MS-DOS 3.30 (5.25-360k)
Pacific C compiler
Link to a freeware version: Pacific C 7.51 for MS DOS Freeware
GENPLUS for DOS Plus patches and creation tools
Link: https://www.seasip.info/Cpm/software/dpgen.zip
DPDISK for DOS Plus
Link: https://www.seasip.info/Cpm/software/dpdisk.zip
EXE2BIN Utility
Link – Freedos BIN2EXE
Stage 1 - Installing MS DOS
To start with I will create a 10MB hard disk image, equivalent to an IBM Fixed Disk Type 1, which would not be an unusual size and one that DOS Plus version 1.2 does not seem to have an issue with using for a native install if you wanted to re-create a more faithful Amstrad 1512 environment without the additional XIOS patching to support larger floppy and hard disk sizes.
So launching DOSBOX-X and creating the initial ’empty’ 10MB Hard Disk image and mounting this IMG file.
IBM Fixed Disk Type 1 geometry is 306 cyls., 4 heads, 17 sectors (10M) – CHS values
IMGMAKE C:\TEMP\DOSPLUS10C.img -t hd -chs 306,4,17 -nofs
imagemount is 512 (bytes), then uses the drive geometry as SHC so the command to mount this created image becomes:
IMGMOUNT 2 C:\TEMP\DOSPLUS10C.img -size 512,17,4,306 -fs none

Using Amstrad's MSDOS 3.2
Now we will install a DOS O/S to the disk image. If you want to re-create a Amstrad 1512 environment you can use the Amstrad disk image below which will boot into MSDOS V3.2
46001 = Amstrad Disk 1 (MICROSOFT MSDOS)
In the Amstrad disk set there are two boot floppy images (46001 for MSDOS and 46004 for DOS Plus). If you unpack the Amstrad disk zip files you can easily create a set of 360K floppy images using DOSBOX-X and for the non-boot disks you can just copy these files into the IMG files (remember to use the -d flag if using pkunzip).
For the boot disks the zip files contain two files a .CFI file and a copy of FDCOPY that you can use to write these images into an empty disk image using DOSBOX-X. With the blank floppy mounted in drive A: and the unzipped file folder in drive B: you can write these by using the following command from the B: drive FDCOPY <name of .CFI file> A:
Using MSDOS 3.3 instead

With MS DOS v3.3 running I can create a Primary DOS partition in the attached hard disk IMG and make it active. As the image is only 10MB I can select the option to use the entire hard disk for the partition which will automatically mark this as active after the obligatory reboot.
Using the imgmount command again to connect DOSBOX-X to the hard disk image file
IMGMOUNT 2 C:\TEMP\DOSPLUS10C.img -size 512,17,4,306

We can now complete the MSDOS installation using the two floppy IMG files. I will – to save on a reboot – mount the 2nd floppy image as drive B and then use the boot from image to boot from the 1st floppy image.
Once booted back into MSDOS the hard disk partition now needs to be created and the MSDOS system files transferred, so I can run the command to perform both of these tasks.
FORMAT C: /S
I will now create a MSDOS directory on the C drive (C:\MSDOS) and copy all of the files from the two MSDOS floppy images into this folder:
MKDIR C:\MSDOS
COPY A:\*.* C:\MSDOS
COPY B:\*.* C:\MSDOS
COPY C:\MSDOS\COUNTRY.SYS C:\
At this point I haven’t bothered creating any config.sys or autoexec.bat as I will do this later once I have DOS Plus installed and I have switched to using 86Box and can update to match the installation better.
At this point we have a configured hard disk image with MSDOS installed which can now be mounted and booted as needed within DOSBOX-X, it is only when we install DOS Plus’s hard disk loader that DOSBOX-X will not boot the IMG file, it can still be mounted it just won’t boot successfully.
Stage 2 - Copying the DOS Plus files from the Amstrad floppy disks to the hard disk image.
Restarting into a clean DOSBOX-X instance I can now mount the hard disk image, this time using the mount disk image commend in DOSBOX-X as the C drive rather than using the imagemount command line as above as this will now be recognised correctly.
I will create a DOSPLUS directory (C:\DOSPLUS) on to the hard drive and will then copy the relevant DOSPLUS files from the Amstrad floppies to the directory.
This is based on the table in the Amstrad 1512 User Manual – Appendix IX, omitting anything specific to the Amstrad 1512, GEM system & BASIC2.
Starting with 46004 and then 46005 I will attach these disk images in turn to Drive A in DOSBOX-X and copy these files into this directory.
From 46004
MKDIR C:\DOSPLUS
COPY A:\*.CMD C:\DOSPLUS
COPY A:\GRAFTABL.EXE C:\DOSPLUS
COPY A:\MODE.COM C:\DOSPLUS
COPY A:\NATIONAL.MSG C:\DOSPLUS
ATTRIB -R -S -H A:\DOSPLUS.SYS
COPY A:\dosplus.sys C:\DOSPLUS\dosplus.sys
*For 1512 option also copy a:\dosplus.sys c:\dosplus.sys
COPY A:\COMMAND.COM C:\DOSPLUS
COPY A:\COMMAND.COM C:\DOSPLUS.COM
this command.com file is the dosplus command.com not the MSDOS command.com, they are different file sizes, so be careful not to confuse them.
From 46005
COPY A:\config.sys C:\config.sys
The 46005 zip file, may not unpack the config.sys file which contains the following lines, if you need to create it manually:
files=20
buffers=5
device=\msdos\ramdrive.sys nvr
country=044
Note that the NVR option here is specific to Amstrad machines so if you are creating this for any other computer you can remove the ‘nvr’ option.
COPY A:\BEEP C:\
COPY A:\AUTOEXEC C:\AUTOEXEC.BAT
COPY A:\BACKUP.CMD C:\DOSPLUS
copy A:\SDIR.CMD C:\DOSPLUS
REM copy A:\ park.com c:\
From 46003
COPY A:\DISKCOPY.COM C:\DOSPLUS
COPY A:\RPED.EXE C:\DOSPLUS
Stage 3 - Creating a patched DOSPLUS.sys and hard disk loader (DPGEN)
John Elliott has created a modified XIOS for DOS Plus which adds support for 720k and 1.4Mb floppies, and hard drive partitions up to 512Mb or so. It also works on a system with more than two hard drives so I will be using this as part of my DOS Plus build.
If you want to create a ‘vanilla’ DOS Plus image then you can skip these steps and continue to boot and install DOS Plus from the two Amstrad disk images (46004 & 46005) and these should work OK.
Downloading the GPGEN file and unzipping the contents into a directory the other main item that will be needed is a copy of the Pacific C compiler. A freeware copy of this is available on Archive.com and is sufficient to be able to compile the c code needed.
Once downloaded I have copied the Pacific C files into the same GPGEN folder, so the C compiler files are all in the same directory structure.
You will also need to copy into this folder a copy of BIN2EXE.COM from the BIN folder in the BIN2EXE.ZIP file.
Also copy EXE2BIN to the folder as well
COPY C:\MSDOS\EXE2BIN.EXE D:\
There is an updated disk.cmd available from John Elliot which is in the DPDISK zip file. This supports the additional disk formats available for higher density floppies. The files from this zip file can be added into the DPGEN folder.
Restarting into a clean DOSBOX-X instance I can now mount the hard disk image, this time using the mount disk image commend in DOSBOX-X as the C drive rather than using the imagemount command line, and then also use the DOSBOX-X command to mount a folder as a hard disk into the D drive.

Changing to the D: drive I can now start to compile and create the patched DOSPLUS.SYS and boot loader.
If you read the readme file included with DPGEN it will work for most instances, however I have found the most success after trial and error in performing the following steps manually, especially to create a working loader program (fixldr.exe). Most of these command are taken from the batch files included but gave adapted these to give me a working solution.
First copy the DOSPLUS.SYS file from the DOSPLUS directory on the C: drive into the DPGEN folder (earlier we copied this file into the DOSPLUS directory so we could retain an original copy for this purpose.
COPY C:\DOSPLUS\DOSPLUS.SYS D:\
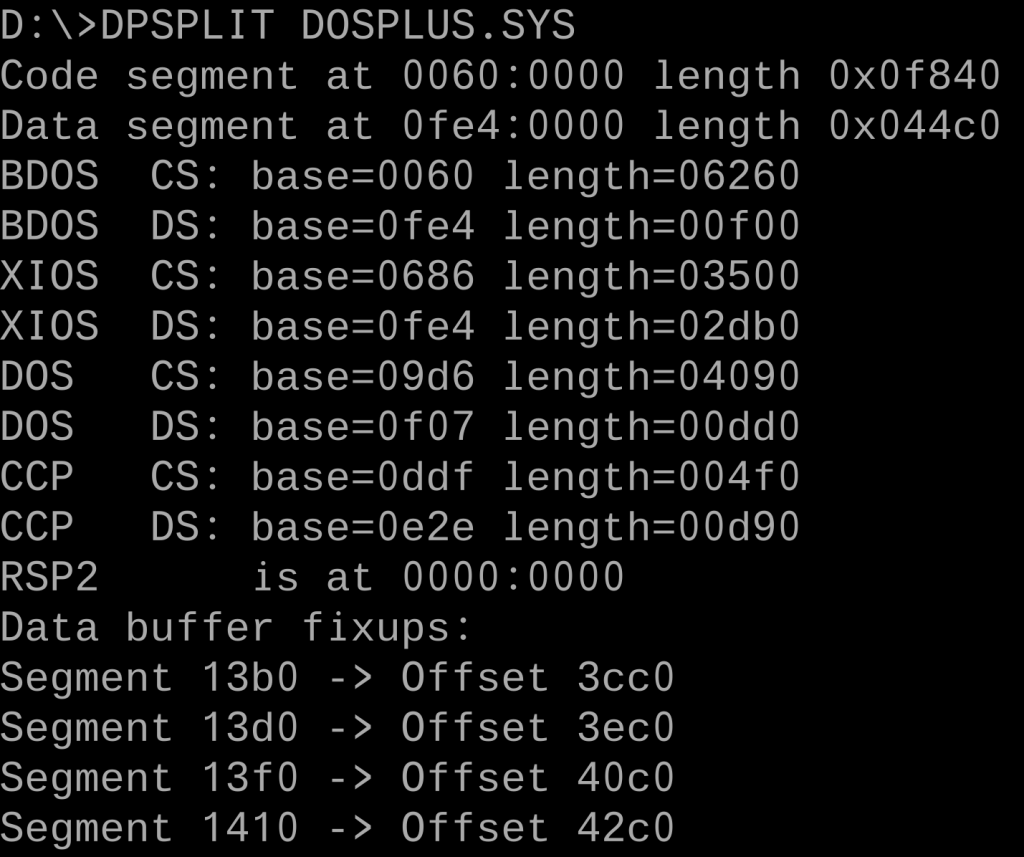
Then run the command which will split the DOSPLUS.SYS file into sperate component files:
DPSPLIT DOSPLUS.SYS
This should create the following files:
- BDOS.CMD
- XIOS.CMD
- DOS.CMD
- CCP.CMD
.
You can then create a patched and re-assembled DOSPLUS.SYS command by running the included batch file MK_SYS.
This will create the new patched file into the directory as NEW.SYS. This will take a few minutes but you can use the DOSBOX-X Turbo speed option to speed this up.
You can then copy this file into the root directory of the C: drive once the compile has completed successfully
COPY D:\NEW.SYS C:\DOSPLUS.SYS
Stage 4 - Creating DOS Plus floppy boot sector files
Run the MK_SEC batch file from the root of the virtual D: drive to create the three different floppy disk boot images:
MK_SEC
This should generate the following files:
- BOOT1440.BIN
- BOOT720.BIN
- BOOT360.BIN
Copy these to the DOS Plus directory.
COPY D:\BOOT*.BIN C:\DOSPLUS
There is an included (and precompiled) utility that you can use to write these boot sectors to a pre-formatted floppy disk to create DOS Plus boot disks if you need them.
COPY D:\BLESS.EXE C:\DOSPLUS
The new DISK.CMD can be generated using the supplied MAKE.BAT file.
D:\MAKE.BAT
Running this will create a utility that supports the extra drive types. Once compiled successfully we can copy and overwrite the old file in C:\DOSPLUS
COPY D:\DISK.CMD C:\DOSPLUS
Stage 5 - Creating the FIXLDR for Hard disk booting into DOS Plus
I found that the following steps were best performed manually rather than using the supplied batch files.
I also didn’t use the quick loader option so I only needed to perform the following actions to create a new patched dosplus loader for my purposes.#
RASM86 FIXLDR
LINKEXE FIXLDR[NOPREFIX]
EXE2BIN FIXLDR.EXE
Note this will create a fixldr.exe and a fixldr.bin not a fixldr.com.
RASM86 LOADER
LINKEXE LOADER[NOPREFIX]
EXE2BIN LOADER.EXE
Note this will create a loader.exe and a loader.bin.
Compile the loader generator utility using the Pacific C compiler using the following command:
\BIN\PACC -Bs LDRGEN.C
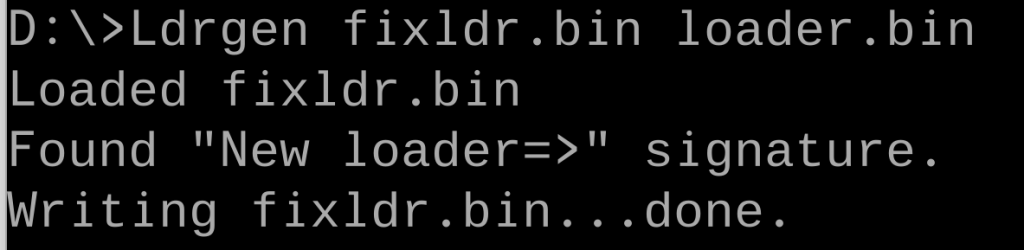
Now create a new fixldr.exe
LDRGEN FIXLDR.BIN LOADER.BIN
COPY D:\FIXLDR.BIN C:\FIXLDR.EXE
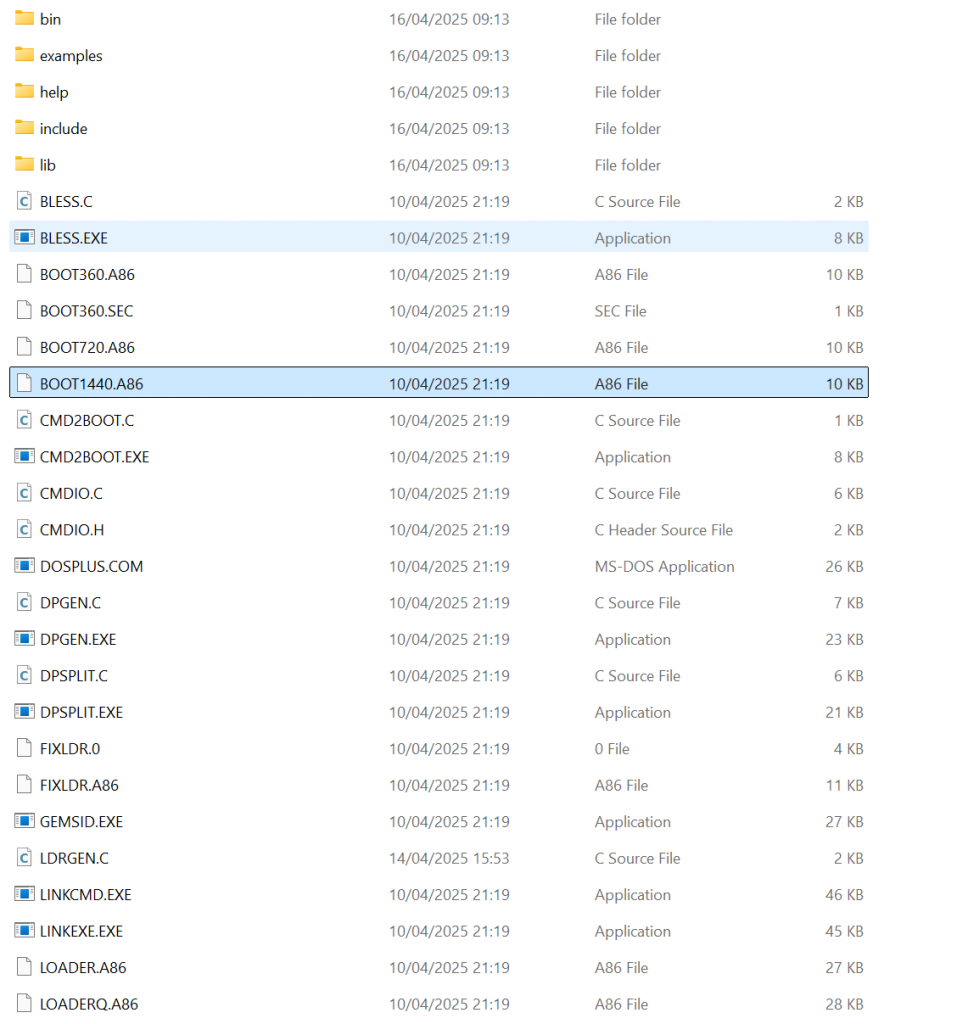
You should now have a C: drive root directory that looks like this:
Stage 6 - Running FIXLDR to enable DOS Plus to boot
After this point DOSBOX-X will not be able to boot the hard disk image, so I will switch to using 86Box instead.
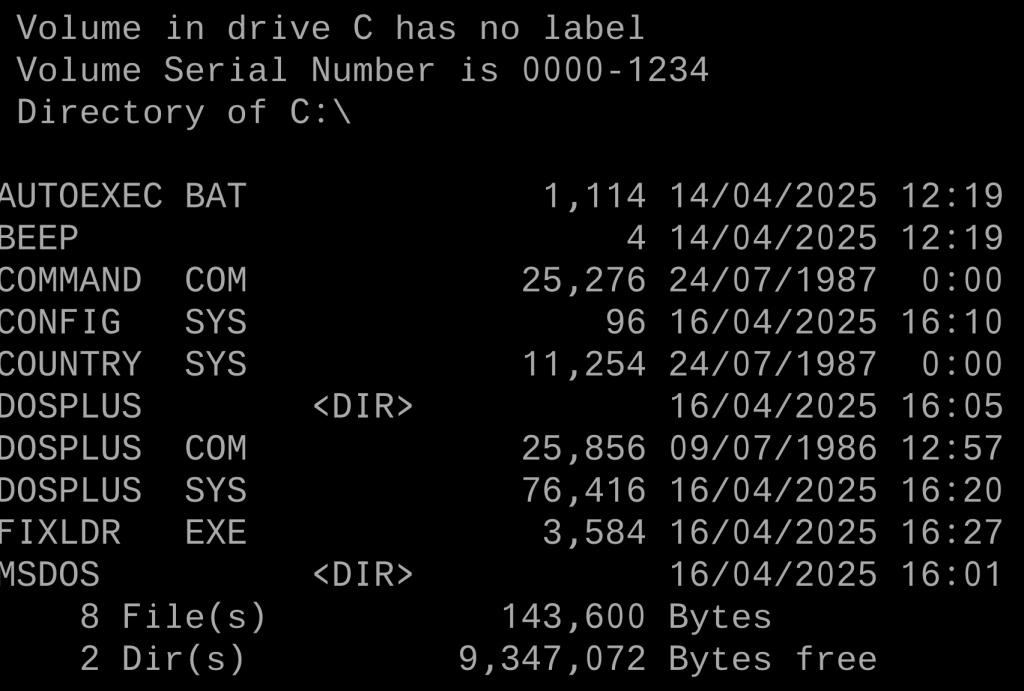
Using the Amstrad 1512 machine option from 86Box and connecting the hard disk image as a hard drive, starting 86Box will boot into DOS. There will be a few error messages from the config.sys and autoexec and it should show the wrong DOS version as we have not changes any of those files as yet.
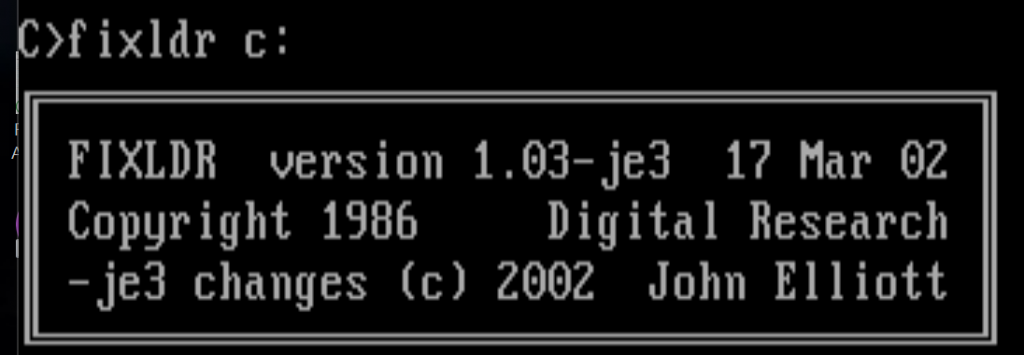
Making sure you are in the root directory of the C: Drive (C:\) run the following command to apply the patched boot loader to the hard disk image.
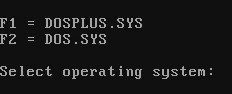
FIXLDR C:
Reboot the virtual machine and if everything has worked you should see the following menu on boot:
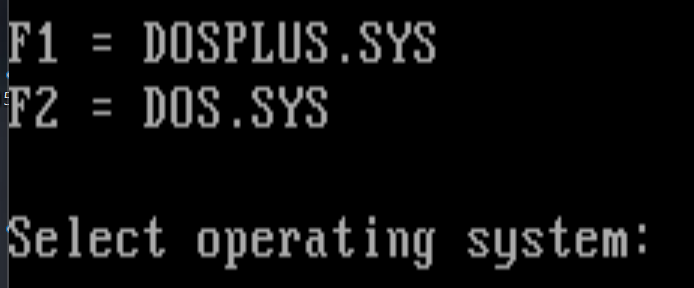
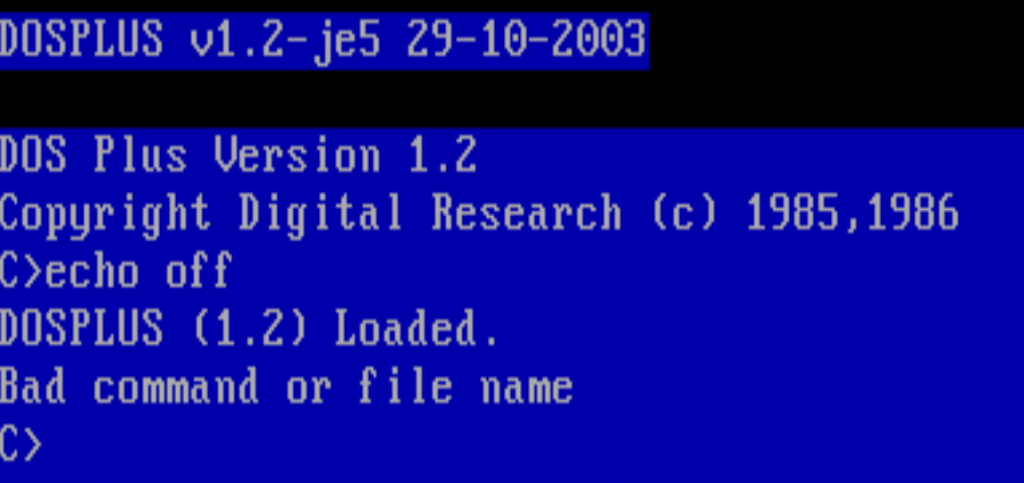
The F2 option should also continue to work to boot into MS DOS (3.3 not what the unedited autoexec states).

Success a working IMG file for both DOS Plus 1.2 and MS DOS 3.3, supporting larger disk sizes and higher-density floppies!!!
Now I just need to create a working computer to be able to use this file instead of relying on some old spinning rust drives.
I hope some of you find this post useful, comment below if you do or have any suggestions or feedback on how this could be improved.
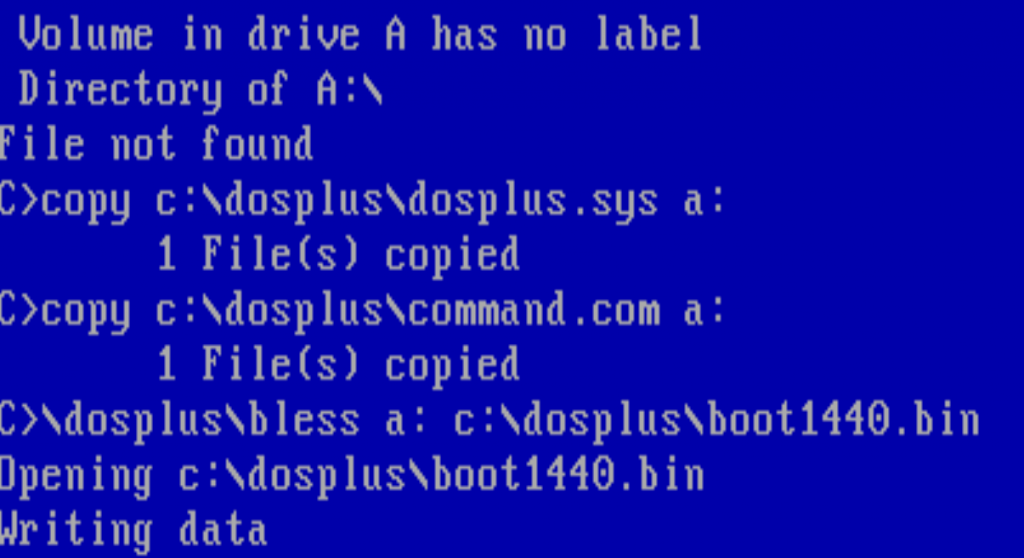
Additional steps to create DOS Plus bootable floppies
To create a bootable floppy insert a formatted floppy disk into a drive and then run the following commands, assuming this floppy is in the A: drive and is a high-density 3.5″ disk (1.44MB)
COPY C:\DOSPLUS.SYS A:\DOSPLUS.SYS
COPY C:\DOSPLUS.COM A:\COMMAND.COM
\DOSPLUS\BLESS A: C:\DOSPLUS\BOOT1440.BIN
Replace the destination drive the boot<>/bin file to match the floppy disk/drive.
In the dpgen folder you will see a set of MK_<>.BAT files that contain these commands as reference. You will see these files also copy GEMSID.EXE which is a debug/inspection tool but isn’t need to support the boot of a DOS Plus floppy.